Difference between revisions of "CMSCIS"
| Line 27: | Line 27: | ||
| − | === '''Security Methodology''' === | + | === <u>'''Security Methodology'''</u> === |
The CMSCIS system utilizes a “User Group – User” method of managing user access to system features. This method of user management is referred to as “Role Based Security” in ASP.NET MVC5. A user group is created in the CMSCIS system and system user accounts are then assigned to a created user group. Each user group is then assigned roles to perform a set of tasks specific to all users in the group. | The CMSCIS system utilizes a “User Group – User” method of managing user access to system features. This method of user management is referred to as “Role Based Security” in ASP.NET MVC5. A user group is created in the CMSCIS system and system user accounts are then assigned to a created user group. Each user group is then assigned roles to perform a set of tasks specific to all users in the group. | ||
Revision as of 14:23, 12 August 2020
This online manual outlines the various processes involved in the management of the Credit Master Systems Complaint Information System (CMSCIS). The CMSCIS system was developed using MSSQL Server as the silo database with a browser based user interface using Microsoft ASP.NET MVC5.
Contents
- 1 System Security & Users Management
- 2 Debtor Information Management
- 2.1 New Debtor Creation
- 2.2 Searching Debtor Information Database
- 2.3 Addresses: Modify & Create Debtor Information
- 2.4 Employers: Modify & Create Debtor Information
- 2.5 Social Media Contacts: Modify & Create Debtor Information
- 2.6 Identification Sources: Modify & Create Debtor Information
- 2.7 Scanned Documents Management
- 2.8 Audit Trail: Search & View Activity
- 2.9 Debtor Details: Update Debtor Information
- 2.9.1 Comments: Create & Modify Debtor Comments Information
- 2.9.2 Tracking: Modify & Create Debtor Information
- 2.9.3 Deactivate & Activate Debtor Records
- 2.9.4 Debt History View
- 2.9.5 PCI (Personal Complaint Information) Issuance
- 2.9.6 Debtor CMS Online Search History
- 2.9.7 Debtor Information Quick Filters
System Security & Users Management
The management of users is an important aspect of any software system that can result in data leakage and mismanagement of system features by users. In an effort to provide a seamless user experience as well as control user access, a user group methodology was implemented in CMSCIS. A user will gain access to the features of the CMSCIS system by first using a set of assigned user credentials to login to the system from a network workstation.
The CMSCIS system is a browser based software system. This means that system users will utilize an internet browser on their workstations to navigate the system and utilize the system features to perform daily tasks. Internet browsers are of different types and may be Microsoft Internet Explorer, Mozilla Firefox or Google Chrome to name a few of the more widely used browsers. Microsoft Edge Browser or Google Chrome browser have been designated as the default Internet Browsers and have been verified to work with all system features. The URL to access the CMSCIS system on the local network is as follows:
Using the above URL address in Microsoft Edge Browser will direct the user to the login window as illustrated below.

The username and password provided to the user should be used to authenticate access to the CMSCIS system. The default landing page upon successful authenticate of credentials will be the “Dashboard”. The image below illustrates the Dashboard of a user belonging to the “Administrator” user group. Users of different groups will be presented with a different cluster of controls on their dashboard as shown below:

Restricted Dashboard
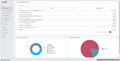
Administrator Dashboard


The main system menu used to navigate the CMSCIS system is located to the left of the browser window. The below image illustrates that the current system interface is the “DASHBOARD”. Left clicking on any of the menu navigation links will take you to the corresponding system module. This menu is collapsible using the collapse arrow located on the right of the system menu. The system menu is also scroll activated and allows for scrolling using a mouse scroll wheel.

Security Methodology
The CMSCIS system utilizes a “User Group – User” method of managing user access to system features. This method of user management is referred to as “Role Based Security” in ASP.NET MVC5. A user group is created in the CMSCIS system and system user accounts are then assigned to a created user group. Each user group is then assigned roles to perform a set of tasks specific to all users in the group.
Definitions:
- User – A user can be defined as a person who uses or operates something, especially a computer or other machine. “Users” of the CMSCIS system are those individuals who have been granted access to the system using a specified set of credentials known by them alone. These credentials include a username and a password. User names are assigned using the “creditmastersystems.com” domain name in the following format jdoe@creditmastersystems.com. This format includes the first initial and last name with the domain name appended.
- Role – A role is a system module that allows an authenticated user to perform a specific task in the CMSCIS system. An example of such a role, as it pertains to the CMSCIS system, is called “ADJOURNMENTS”. This role allows a user to “UPDATE COURT DATE (ADJOURNMENT)”. Roles in the CMSCIS system can be of two types either a “COMMAND” or a “MENU”. These designations refer to the role being a command button that executes a specific task or a menu option that gives access to a system window or interface respectively.
- User Group – A user group can be defined as a group of people with the same interests, who use a particular product or service. With this definition in mind a group of system users who all perform the same tasks in the CMSCIS system are therefore referred to as a “user group”. A user group is created in the CMSCIS and system “roles “ or “rights” are granted to the user group.
The diagram below is a visual representation of the implementation of roles, users and groups in the CMSCIS system. The diagram illustrates the existence of two user groups “User Group A” and “User Group B”. Both these user groups have been assigned system roles respectively. The diagram indicates that the user “jdoe@creditmastersystems” has been created in the CMSCIS system and has been assigned both defined system groups, “User Group A” and “User Group B”.

This diagram illustrates an important feature to be taken into consideration in the administration of system users. A user can be assigned to one or more groups at a time. This is a feature of the CMSCIS system. As illustrated above both user groups have “Role A” and “Role B” but are different in the existence of “Role C” and “Role D” in User Group A and “Role F” and “Role G” in User Group B. When assigned to both user groups, system user jdoe@creditmastersystems will have access to all features of both groups. This feature allows for flexibility in the assignment of groups to a user and allows for the potential for elevated or reduced accessibility at the discretion of the system administrator.
System Role Creation
Note: The steps outlined in this section are for information purposes on the usage of this system feature. All new system roles do not automatically become activated but will require implementation into the software code to become usable.
- Navigate the main menu option to select the "Security" sub menu. On the sub menu please select the “Security Roles” option and left click.
- The figure below is a representation of the main roles user interface. This page is used to create and update systems roles that allow users to perform work tasks in the CMSCIS system. The “Grid Filter Options” allows for quick filtering of the main grid to allow for fast location of systems roles based on the selected filter type. Each column on the grid can also be filtered by typing words in the columns. The grid will automatically begin to perform a search based on the provided word criteria and present results in the filtered grid. To clear all filters and reset the grid to its initial state the “ALL” filter in the left filter menu should be clicked.

- Please click on the button labeled “Create New Permission” to activate the role creation / edit popup window shown below.

- Please provide the name of the new role and the description of the new role. Please note that all fields are required on this window. (Note: Required fields will be indicated with a green asterix symbol.)
- Please the “Save New Permission” button to submit the new role with the details provided or click the “Cancel” button to exit the popup window and discard the details of the unsaved role.
- A confirmation window will be presented indicating the role has been saved successfully.
Editing System Roles
- Navigate the main menu option to select the "Security" sub menu. On the sub menu please select the “Security Roles” option and left click.
- Please click on the row in the roles grid list to select the role that is to be edited.
- Please click on the “Edit” grid button in the far right hand corner of the selected grid row. Clicking on the edit button will invoke the role popup window in “Edit” mode. In edit mode only two (2) fields will be updateable, “Description” and “Type”.

- Please click the “Update Permission” button to save the changes made to the security role.
Role Access List
- Navigate the main menu option to select the "Security" sub menu. On the sub menu please select the “Security Roles” option and left click.
- Please click on the row in the roles grid list to select the role that you would like to investigate.
- Please click on the “Details” grid button in the far right hand corner of the selected grid row. Clicking on the “Details” button will invoke the role “Permission User” popup window. This window, shown below, provides a list of all system user accounts that have been granted access to execute the selected grid role.

- The list of users with the granted role can be printed by clicking on the “Print Screen” button
User Group Creation
Note: For a more detailed explanation of the methods and concepts employed in the CMSCIS security system please see Section 1.1 of this manual.
- Navigate the main menu option to select the "Security" sub menu. On the sub menu please select the “Group Definition” menu option and left click.
- The figure below is a representation of the main user group user interface. This page is used to create and update system user groups that allow groups of users to perform similar work tasks in the CMSCIS system. The “Grid Filter Options” allows for quick filtering of the main grid to allow for fast location of systems groups based on the selected filter type. Each column on the grid can also be filtered by typing words in the columns. The grid will automatically begin to perform a search based on the provided word criteria and present results in the filtered grid. To clear all filters and reset the grid to its initial state the “ALL GROUPS” filter in the left filter menu should be clicked. (Note: Inactive groups will appear highlighted as shown below. User accounts cannot be have an inactive group assigned to them)

- Please click on the button labeled “Create User Group” to activate the group creation / edit popup window shown below.

- Please provide the name of the new group and the description of the new group. The “Inactive” checkbox can be used to set the new group as not active for assignment to user accounts. Please note that all fields are required on this window. (Note: Required fields will be indicated with a green asterix symbol.)
- The “In Role(s)” list is used to select “Roles” from the system that have been created in Section 1.2 and grant them to the new user group. Please carefully select the list of roles you would like to grant to the new user group by clicking on the checkbox next to the role in the list. Multiple roles can be selected at a time and saved.
- Please the “Save New Group” button to submit the new user group with the details provided or click the “Cancel” button to exit the popup window and discard the details of the unsaved user group.
- A confirmation window will be presented indicating the group has been saved successfully.
Editing System User Groups
- Navigate the main menu option to select the "Security" sub menu. On the sub menu please select the “Group Definition” option and left click.
- Please click on the row in the group grid list to select the user group that is to be edited.
- Please click on the “Edit” grid button in the far right hand corner of the selected grid row. Clicking on the edit button will invoke the user group popup window in “Edit” mode. In edit mode only two (2) fields will be updateable, “Description” and the “Inactive” checkbox. Additional roles here be added to the selected user group or revoked by either selecting or deselecting the checkbox options next to the pertinent roles in the list.

- Please click the “Update Group” button to save the changes made to the security user group.
Group Users List
- Navigate the main menu option to select the "Security" sub menu. On the sub menu please select the “Group Definition” option and left click.
- Please click on the row in the user group grid list to select the group that you would like to investigate.
- Please click on the “Details” grid button in the far right hand corner of the selected grid row. Clicking on the “Details” button will invoke the role “Group Permissions” popup window. This window, shown below, provides a list of all system access roles that have been granted to the selected user group and can be executed by its users.

- The list of roles granted to the user group can be printed by clicking on the “Print Screen” button.
User Account Creation
Note: For a more detailed explanation of the methods and concepts employed in the CMSCIS security system please see Section 1.1 of this manual. A user account is to be assigned to one system user only. All users of the CMSCIS system should be assigned a personal user account.
User accounts and passwords should never be shared!!
The CMSCIS system does not provide for individual user account creation through the usage of a “Register” feature. All user accounts must be created by a system administrator and granted an initial password. A user can change his or her password if it is compromised at any time once logged into the CMSCIS system.
- Navigate the main menu option to select the "Security" sub menu. On the sub menu please select the “User Definition” menu option and left click.
- The figure below is a representation of the main user management interface. This page is used to create and update system users that allow authenticated user to perform work tasks in the CMSCIS system. The “Grid Filter Options” allows for quick filtering of the main grid to allow for fast location of systems users based on the selected filter type. Each column on the grid can also be filtered by typing words in the columns. The grid will automatically begin to perform a search based on the provided word criteria and present results in the filtered grid. To clear all filters and reset the grid to its initial state the “ALL USERS” filter in the left filter menu should be clicked. (Note: Inactive user accounts will appear highlighted.)

- Please click on the button labeled “Create New User” to activate the system user creation / edit popup window shown below. The popup window is opened in the “Create” mode

- Please provide the email address of the new user account. The “Email” address is used as the “username” in the CMSCIS system. The email box is auto populated with the “@creditmastersystems.com” extension. The administrator is expected to add the first initial and last name of the user as the user email / username as follows, “jdoe@creditmastersystem.com”. If a user account email already exists with the first initial and last name it is possible to use the first name and last name separated by a period as follows, “john.doe@creditmastersystems.com”. Using the email extension is required.
- Please provide a password in the password entry box and retype the password in the confirmation box. All passwords must have at least one (1) upper case letter, one (1) digit numeric value and a non-letter or digit character such as follows (!,@,#,$,%,^,&,*,(,<,),~). If these criteria are not met you will be prompted to make changes to the password field. The administrator will assign a password in this first instance and supply the user email and password to the new system user. A suggested default password for use on new accounts is as follows “Password123$”.
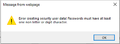
Error 1
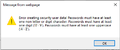
Error 2

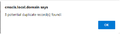
- Please supply all require fields marked with a green asterix.
- Please select a user group to which the new user account will belong. (Note: A new user account can be created without being assigned to a user group. In that case the user will have no rights in the system and may have access to a few system functions.)
- Please assign any other special features that the user account will carry from the “User Options” section of the new user window.
- Please click the “Save New User” button once all data has been provided for the new user account.
- Successful creation of a new user account will result in a confirmation message from the system.
Edit System User Account Settings
- Navigate the main menu option to select the "Security" sub menu. On the sub menu please select the “User Definition” menu option and left click.
- Please click on the user account row in the user grid list to select the user account that is to be edited.
- Please click on the “Edit” grid button in the far right hand corner of the selected grid row. Clicking on the edit button will invoke the user account popup window in “Edit” mode. In edit mode all fields except the “User Name” field will be updateable.

- Please make the necessary changes to the user account and click the “Update User” button to save the changes to the account. Please note you will not be able to reset a password using this window. The user will need to edit their password after successful login in the far bottom left of the screen page. In this location the user can click on their user name and be taken to a password reset page.
User Details List
- Navigate the main menu option to select the "Security" sub menu. On the sub menu please select the “User Definition” option and left click.
- Please click on the row in the user account grid list to select the user account that you would like to investigate.
- Please click on the “Details” grid button in the far right hand corner of the selected grid row. Clicking on the “Details” button will invoke the role “User’s Group(s)” popup window. This window, shown below, provides a list of all user groups to which the selected user belongs.

- The list of user groups to which the selected user account belongs can be printed by clicking on the “Print Screen” button.
Reset/Change User Account Password
- Please login to the CMSCIS system using your user account credentials. The default landing page for all user accounts after successful authentication is the “Dashboard”. Located at the bottom left corner of all system pages in a section containing two (2) hyperlinks. The first hyperlink navigates to the “Account Settings” management window. The second link labeled “Log off” will terminate the current login session and logs the user out of the CMSCIS system.
- Please click on the hyperlink of the email address of the authenticated user. In the screenshot above the authenticated user is “admin@creditmastersystems.com”. Clicking on the email hyperlink will navigate the browser to the account settings page illustrated below.

- Please click on the “Change your password” hyperlink to be taken to the password reset page as shown below. (Note: The authenticated user is able to use the browser navigation controls to go back to the previous page or click “Dashboard” to be navigated to the system dashboard. The user is also able to “Log off” the CMSCIS system from the above illustrated page.)

- Please supply the current user password and the new user account password followed by a confirmation of the new password. (Note: The new password must conform to the same constraints as outline is step 5 of Section 1.8.)
- Please click the “Change password” button. After successfully changing the password the user will be navigated back to the Account Settings page in step 2. Please click the “Dashboard” link to be taken back to the main CMSCIS system interfaces.
Debtor Information Management
The management of information collected on individual persons and companies is at the very heart of the core functions of the CMSCIS system. Credit Master Systems (CMS) gathers information on debtors primarily from its client contacts who may engage the collection services of CMS to recover outstanding collectible funds from its own clients.
CMSCIS allows for the collection and management of various data points on individual debtor information. The system allows for the recording of multiple debtor addresses, employer details, social media contacts and identification types. CMSCIS maintains a database of scanned debtor documents and allows for these documents to be catalogued, stored and retrieved in an integrated fashion.
The figure below is a representation of the main debtor information interface. This page is used to create and update debtors tracked by the CMSCIS system as well as all personal information data points such as address, employment details, social media contacts, identification types on file, ownership details for companies and scanned document sources. The main debtor information page auto loads with all debtors listed in a paged grid format sorted by “CMS Number” in ascending order.

New Debtor Creation
Note: New debtors are added to the CMSCIS system using a designed wizard interface that seeks to enforce data collection rules as well as performs a mandatory search of existing debtors before proceeding with the creation of new debtor details in the system database.
- Navigate the main menu option to the "Debtor Information" sub menu under the “File” section of the main navigation menu.
- Please locate the “New Debtor” button on the horizontal toolbar menu to initiate the “New Debtor Creation Wizard”. The first page of the creation wizard, “Step 1: Debtor Search”, is designed to perform a database search of existing records of the CMSCIS database. The purpose of this first step is to try to reduce the creation of duplicate records in the database for identical debtors. The figure below shows the first page of the debtor creation wizard completed with a last name “Smith”, a first name “John” and a date of birth “05-May-1956”. (Note: Date entry is expected in the format ‘dd-MMM-yyyy’). The CMSCIS system will use these three (3) parameters to perform a multi tiered search of the CMSCIS database to identify possible matches in the database.

- Please click the “Search” button on the first wizard page to perform the database search with the parameters supplied. Note: All boxes are required.
- The CMSCIS system will perform searches of the database based on an algorithm aimed at locating results on multiple factors (Please see the box “Name Search Algorithm” for more details).

- If the search algorithm produces search results the following two messages will be displayed to the user: • Search result count and advisory to review all search results before proceeding with new record.
Results Message
Review Prompt
- The figure below will be displayed to the user with search results if they are found in the database with an indication of what level search yield the resultant records. It is strongly recommended that search results produced by Level 1 or Level 2 searches be carefully reviewed before creating any new debtor in the CMCIS database to prevent record duplication.

- The search results grid presented in the above image provides a hyperlink on each “CMS#” row that can be used to navigate to the debtor information page for further review of the existing database debtor record, to ensure that the new intended debtor record does not already exist in the database. Note: Clicking on any hyperlink will close the debtor creation wizard and will require the wizard to be started again. Once it is confirmed that the new debtor record that is to be created does not already exist the CMSCIS database please click on the “Next – Debtor Details” button on the “New Debtor Creation Wizard” window. If there were previous search results loaded in the grid, CMSCIS will present a final warning as shown below.

- The below image illustrates “Step 3: Debtor Details” of the debtor creation wizard. Please fill in the required fields such as Last Name, First Name, DOB, Gender and Status. All required fields are noted with a green asterix to the left of the entry box caption.

- Please click the “Next – Address Details” button to be proceed to step four (4) of the creation wizard. The below image demonstrates the “Step 4: Address Details”.

- Please fill in the required fields on Step 4 of the debtor creation wizard. Please provide as much information as possible on the form and click the “Next – Employment Info” button when finished with data entry boxes. The image below is a depiction of the next step in the debtor creation wizard “Step 5: Employer Details”.

- Please fill in the required fields on Step 5 of the debtor creation wizard. Please provide as much information as possible on the form and click the “Next – Identification Details” button when finished with data entry boxes. The image below is a depiction of the next step in the debtor creation wizard “Step 6: Identification Details”.

- Step 6 of the debtor creation wizard defaults to the “SOCIAL SECURITY CARD” identification type and provides for the supply of the other supporting details available on the Social Security Board issued identification card. Please fill in the required fields on Step 6 of the debtor creation wizard. Please provide as much information as possible on the form and click the “Next – Social Media” button when finished with data entry boxes. The image below is a depiction of the final step in the debtor creation wizard “Step 7: Social Media & Maternal Details”.

- Please fill in the required fields on Step 7 of the debtor creation wizard. Please provide as much information as possible on the form and click the “Submit” button when finished with data entry boxes. The image below is a depiction of the final confirmation message that is presented before the submission of the wizard details are sent to the server for storage.

- Upon successful record submission you will be presented with the following confirmation message indicating that the new debtor has been successfully stored in the CMSCIS database.

- After successful submission of the new debtor information to the database the CMSCIS system will conduct an automatic search on the new CMS# issued to the debtor and automatically load the newly created debtor record in the browser window. You will see one record presented in the search grid.
Searching Debtor Information Database
Note: Two methods of searching the CMSCIS debtor information database have been implemented in the debtor information page. These methods are:
- Cross Column Searching
- Automatic grid column search filtering.
Cross Column Searching – The debtor information page, see page 18, has been designed with a “Cross Column Search Box” in the top right corner of the page. This search feature has been designed with the capacity to search multiple grid columns at the same time, looking for matches of search parameters provided by a user.
The debtor information search results grid has a total of 10 columns of displayable data. “Last Name”, “First Name”, “Middle Name”, “CMS Number”, “Social #”, “DOB”, “Status” and “Verified” grid columns are displayed by default. There are two (2) additional columns that are hidden “A.K.A” and “Gender” that can be dragged and dropped onto the grid from the column chooser window.
Please click the “Column Chooser” menu button from the top middle menu toolbar to display the column chooser window.

All grid columns can be dragged and dropped to and from the column chooser list to either add or remove visible columns to the debtor search grid. The cross column search box action is executed across the “Last Name”, “First Name”, “Middle Name”, “A.K.A”, “CMS Number”, “Social #” and “DOB” columns of the debtor information grid. This means that CMSCIS will actively look for matching records in each of these columns.
Please ensure all grid column filters are cleared by clicking the “Clear Grid Filters” button before proceeding with this search feature.
- Locate the Cross Column Search box in the top right hand corner of the Debtor Information page as illustrated in the below image.

- Please type the search text that you would like the CMSCIS system to locate in the debtor information database. (Note: The system is capable of locating records based on complete words and partial words or what is termed a “substring” of a word.) As an example lets type the following in the search box “john young” and hit the enter key on your keyboard. The system will return all records where the word “john” or the word “young” appears in any of the grid columns. (Note: Words must be separated by a single space for them to be treated as individual search words by the CMSCIS search system.)
- Let’s now type the words “joh youn” which represents substrings of both the first and last names to be located in the database. The search algorithm will return all columns where the search words are found in entirety or partially. This time you may note more records are retrieved from the database as the search parameters allow for a wider search range and subsequent potential matches.
- We can further add search parameters to fine tune the search results. In this case please type “john young 5”. In this case only one database record may be returned corresponding to one debtor having details matching the search combination.

- The above diagram shows the matching search result of “YOUNG JOHN ALEXANDER” with CMS# ‘745’ and Social Security number ‘000010895’, Date of Birth Jan-24-1938 who is ‘DECEASED’ and the record not verified. The system matched ‘YOUNG JOHN’ and the number 5 appearing in the CMS# and the Social# columns, a singular record was located. If the search string was changed to “joh youn 5”, the CMSCIS system would instead locate two (2) records as shown below. (Please scroll to the top of the results grid to view all returned search results.)

- The above screenshot shows that there are now two (2) records that match the “joh youn 5” pattern. The second record now qualifies and matches the pattern as the ‘Middle Name’ of the now included record has a value of ‘JOHANNA’ a social security number of ‘000365927’ and a date of birth of ‘Sep-25-1992’. The cross column search feature is therefore a powerful tool in locating records in the CMSCIS debtor information database.
- In order to clear the search results and refresh the grid to its original state, please clear all text from the search box and hit the “Enter” key on your keyboard.
Automatic grid column search filtering – The debtor information page (See page 18 of this manual) has been designed with a debtor information grid that displays search results for debtors stored in the CMSCIS database. This grid is comprised of 10 columns that can be custom organized, hidden or displayed.
Each of the ten (10) grid columns is equipped with an editable filter box with a filter setting associated with it and can be accessed by clicking the filter icon next to the column filter box on each grid column. The default filter setting on nine (9) of the ten grid columns is “Contains”. This means the grid search will seek to find matching records that contain the provided search parameter in any part of the grid row data for that column.

The ‘CMS Number’ column is the only column that has a different filter setting. This column has a default filter setting of “Equals”. This setting will only locate records that exactly match the search parameter or CMS number in this case provided.

The “Last Name”, “First Name”, “Middle Name”, “CMS Number”, “Social #”, “DOB”, “Status” and “Verified” grid columns are displayed by default. There are two (2) additional columns that are hidden “A.K.A” and “Gender” that can be dragged and dropped onto the grid from the column chooser window.
Please click the “Column Chooser” menu button from the top middle menu toolbar to display the column chooser window. All grid columns can be dragged and dropped to and from the column chooser list to either add or remove visible columns to the debtor information search grid.
- On the Debtor Information page please click the “Clear Grid Filters” from the top tool bar menu. Please also clear the “Cross Column” search box located in the top right corner of the page by selecting all text in the box and deleting the contents.
- Click inside the ‘CMS Number’ column filter box and type ‘4321’. The gird will automatically begin to perform the filter operation on the grid based on the parameter provided within 3 seconds after typing has terminated in the box.
- The grid will display all records having a CMS number of 4321. In this case the debtor information record for ‘MIGUEL ANGEL VEGA’ will be presented in the filtered grid.
- We will now perform a search for all persons with the last name “YOUNG” and first name “ANN”. On the Debtor Information page please click the “Clear Grid Filters” from the top tool bar menu. Please also clear the “Cross Column” search box located in the top right corner of the page by selecting all text in the box and deleting the contents.
- Click inside the ‘Last Name’ column filter box and type ‘young’. The gird will automatically begin to perform the filter within 3 seconds. Please click inside the ‘First Name’ column filter box and type ‘ann’. The gird will automatically begin to perform the filter within 3 seconds. There will now be at least sixteen (16) records located in the debtor information database have a last name containing the word ‘young’ and a first name containing the word ‘ann’. There will also be records with first names including ‘ANN’, ‘ANNA’, ‘ANNA-FRID’, ‘ANNALEE’, ‘JOVANNIE’, ‘LYANN’ and ‘SHANNON’. This is based on the ‘Contains’ filter setting on the grids. The system will look for any and all first names where the search parameter is ‘contained’ in the name. (Please scroll to the top of the grid to view all search records.)
- Additional columns can be added be filters simultaneously to further fine tune and filter search results. Therefore the automatic grid filter search feature is a powerful tool in locating debtor information in the CMSCIS database.
- Please click the “Clear Grid Filters” button on the top toolbar menu to clear all grid filters and restore the grid to its original unfiltered state.
- There are a few preset filter options provided on the toolbar menu under the button “Quick Filters”. These filters can be a quick starting point in locating all “DECEASED” debtors or a list of all “VERIFIED” debtor records.
Addresses: Modify & Create Debtor Information
Note: New debtors are added to the CMSCIS system using a designed wizard interface that seeks to enforce data collection rules as well as performs a mandatory search of existing debtors before proceeding with the creation of new debtor details in the system database. During this process details of the current address of the debtor is gathered and stored under the “Addresses” tab page of the Debtor Information page. Additional address information can be added or updated under this section of the debtor information page.
- Navigate the main menu option to the "Debtor Information" sub menu under the “File” section of the main navigation menu.
- Perform a search for the debtor in the CMSCIS system using section 2.2 of this manual and select the debtor record from the results grid.
- Select the “Addresses” tab page on the lower half of the debtor information page to view and edit the existing addresses held on record for the selected debtor.
- If the selected debtor has address on file they will be presented in the “Address List” grid. The image below shows the “Addresses” tab page selected with the “Address List” displayed and showing the total list of address on file for the selected debtor.

- In the image above one (1) grid button option is available, “Edit”. Clicking on the “Edit” grid button will load the selected address record in the edit popup window as show below. In this window you are able to make changes to the debtor address record and update the CMSCIS database. Please make any necessary changes to the selected address record and click the “Update” button. (Note: Please note that only one (1) address record can be marked as “CURRENT” and will be reflected as the “Current Address” on all reports from the system as well as on the “Details” tab for the selected debtor information record. Updating any address with the “CURRENT” status will reset all other address on record to “PREVIOUS”.)

- Clicking the “Print” button on the above address details form popup will export a screenshot of the address form with its details to a printable form.
- Please click the “New Debtor Address” button to open the debtor address entry window as shown below. This form is used to create new address records in the database for the selected debtor.

- Please fill in all required fields on the form, as indicated by green asterix (*), and click the “Update” button to complete the creation process. The note at step 5 will still apply.
- The “Audit History” tab is also available to view the log of changes made to the debtor address records. Please select an employer record from the “Address List” grid. Please select the dates during which changes may have occurred to the selected address record and click the “Search” button. The grid results can then be exported to excel format using the “Export” button.